The Internet is probably one of the main reasons you bought your Mac. When you’re online with your notebook or desktop Mac, you can surf the web, send and receive emails, make Internet telephone and video calls, buy apps and media and more. Here’s a guide to getting online using the Mac’s Wi-Fi connectivity.
Going Online with your Mac
Make sure your Mac is within range of your wireless router. Click on the Wi-Fi icon in the menu bar as shown, and look at the list of available Wi-Fi networks. If Wi-Fi is currently turned off, switch it on using this same icon.

Find the name of your own Wi-Fi network. If you don’t know it, check your router’s instruction manual, or maybe look for a sticker on the router itself. Choose that network, and if prompted, enter the password. This too should be in the router manual or on the router.
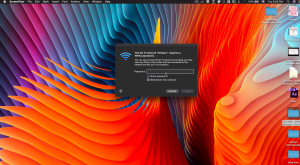
Make sure Remember this Network is ticked, so you don’t have to enter your Wi-Fi password again. Your Mac logs on to the network and the Wi-Fi icon shows it’s made a connection. If the icon is only partly darkened, your signal strength is weak, so move your Mac nearer the router.
Configuring Your Wi-FI
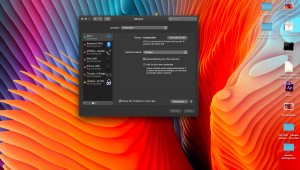
Open System Preferences from the Apple menu in the top left corner of the screen or from the Dock and click on the Network preference pane. Press the Advanced button and make sure the Wi-Fi tab is open, from the list across the top of the window.
You can see a list of all the Wi-Fi networks your Mac has connected to, in order of preference; where two networks are available, the higher one is used. If you want to change this order, simply drag and drop them.
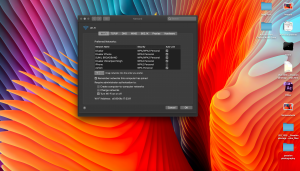
To remove a network from this list, click on it and click on the minus button below the list. On this window, you can also make the Mac ask for admin authorisation for network tasks, using the checkboxes at the bottom.