Setting up your new desktop or notebook Mac for the first time can be a daunting experience but it’s nothing to be afraid of. In this section we take you through the initial set up process, from switching it on and setting up or logging in with your Apple ID, all the way to having it ready to use..
Setting Up Your New Mac
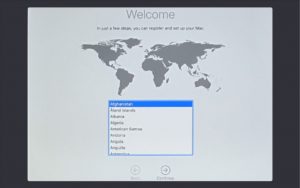
Your first step is to choose your territory, that is, where you live and will be using your Mac. You can scroll the list of countries up and down to find your own. Click your country to highlight your choice and then click the arrow marked Continue.

Now select your keyboard layout. This is very straightforward. The layouts on offer are decided by your choice of language and territory but again, you can click Show All to reveal a wider range of options. Choose your layout and proceed once more.

Now choose your Wi-Fi network. Scroll up and down the list until you find your router’s SSID (service set identifier) and click on it. Enter the password in the field provided and move on. The router’s SSID and its password should be supplied with the router.

Next comes the Data & Privacy screen. You’re shown an icon that appears when an Apple feature collects information, and needs your permission. There’s nothing you need to do on this screen, just read it for reference and move on once more.
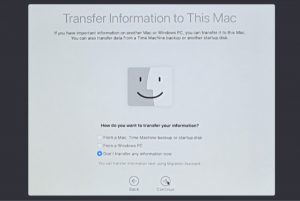
You’re invited to transfer information from a Mac or Time Machine backup, a Windows PC or not at all. To transfer data from your old computer, choose the correct option and follow the on screen instructions. Otherwise, choose the last option to start afresh.

Now it’s time to sign in with your Apple ID. If you already have an Apple ID, sign in now with your password. If you don’t, click the Create New Apple ID link and follow the on-screen instructions. There’s also a link for if you’ve forgotten your Apple ID.
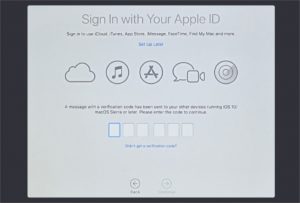
If you already have an Apple device, a six-figure identification number is sent, which you must type now. If it doesn’t arrive for any reason, click the link under the number fields and follow the instructions. Otherwise, type the numbers and proceed.
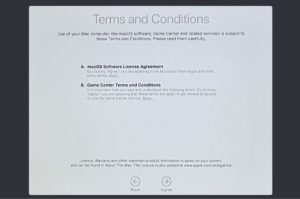
You’re shown a screen of Terms and Conditions, which you can read by clicking More under each entry if you wish. When you’re ready, click the right-pointing arrow at the foot of the screen to agree. Then click the Agree button on the pop-up screen.
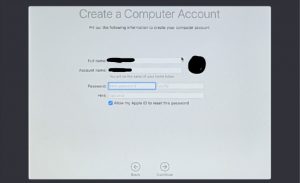
Your account name is based on your Apple ID name but your password, which unlocks the computer, should be chosen now. Choose something you can remember and enter a hint in case you forget. We recommend you agree to both the checkbox options.
Your account name is based on your Apple ID name but your password, which unlocks the computer, should be chosen now. Choose something you can remember and enter a hint in case you forget. We recommend you agree to both the checkbox options.
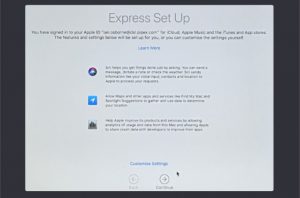
On the Express Setup screen, you can set up your Mac quickly, by allowing predetermined settings to take effect, for things like Siri and Maps. You can customize these settings by clicking the link; we suggest you just click Continue instead.

Choose whether to secure your disk with File Vault Encryption. If you change your mind later, you can go to System Preferences > Security & Privacy, and click on the File Vault tab. You can change your File Vault preferences from there.

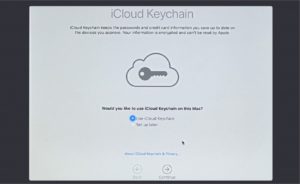
If you accept the option to store all your files in your iCloud service, documents and data on your Mac’s desktop and in your Documents folder are synced across all the Apple devices logged into the same Apple ID. This is convenient but takes up storage space.
If you accept the option to store all your files in your iCloud service, documents and data on your Mac’s desktop and in your Documents folder are synced across all the Apple devices logged into the same Apple ID. This is convenient but takes up storage space.
This step is straightforward. Choose whether to share analytic data with Apple and also with third-party developers. This data is sent privately, with no personal information attached. It’s up to you whether you allow it to be sent; make a choice and proceed.

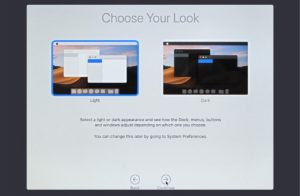
If you change your mind about some of your chosen options, you can change them in System Preferences. For example, the Analytics option is in Security & Privacy > Privacy and the Light or Dark Appearance is found in the General pane.